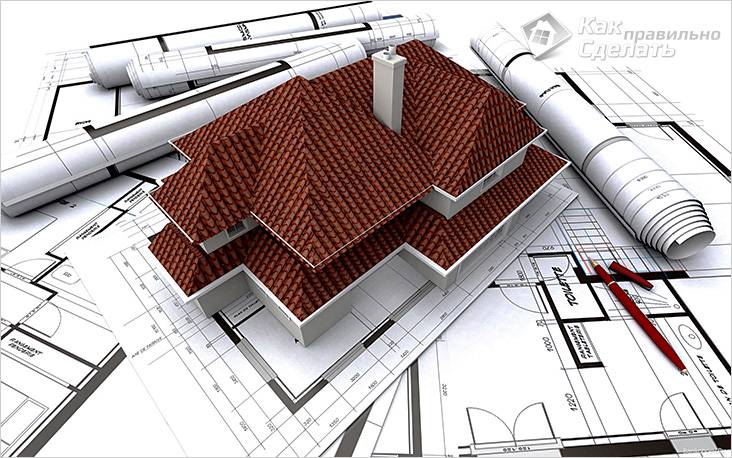
How to build your own brick house. How to build a brick house with your own hands. How much brick is needed to build a house
As you know, every man must do three things in his life. One of them is to build a house. This is a very crucial stage, requiring certain knowledge and skills. To realize your dream, you need to consider where to start work, what you need to buy and what stages of construction you need to overcome. Despite the fact that today there are new technologies and building materials, brick is often chosen as the material for the house. And this is not surprising, since it has several advantages, such as environmental friendliness, acceptable thermal insulation properties, fire resistance, durability, reliability and excellent appearance.
Use suitable materials for walls and foundations, but keep in mind any cheaper alternatives. Here you must evaluate how much wood you will need based on the design, the cost of walls and windows, power tools and appliances, etc. Tiny houses can be simple or complex depending on the type of architecture used and the add-ons that we include in the design.
Regardless of whether you are an amateur architect or prefer to hire someone with professional knowledge in the field of architecture, it is nice to have plans in case the city has any negative reviews about your permission.
In this article we will tell you how to build a house of brick with your own hands, demonstrate the drawings, photos and video instructions. Even if you do not have experience in bricklaying, you can quite accomplish this task.
What you need to know before construction
Before you start building a house, you need to do some preparatory work. It is noteworthy that simply you can’t buy a plot and start building a house there. More precisely, you can do this, but such construction will be illegal.
Tools and materials
Be sure and check your site’s laws regarding ownership before completing your plans. Once you make sure your plans are subject to the relevant zoning laws, it's time to grab your permission from the city! Be patient, the process of obtaining a building permit can take from one to 30 days, depending on the complexity of the plans for your new home.
Prepare a site, materials and foundation
After we got a building permit, it's time to get our hands on! When choosing which direction your home is in, consider the exposure of the sun. If you want a specific area inside to be exposed to sunlight in the evening or in the morning, consider this as well. Also consider what views you want your windows to have. It is also time to evaluate whether you want a place for an access road or yard, and if so, where do you want them to be located.
First you need to get permission to build from the district administration. To do this, you need to collect the necessary package of documents: application for construction, copies of ownership, sale, passport and other documents. Among them should be drawings of future construction, and coordination with various services. After reviewing your application, you will be given a building permit. This can be done even after the completion of construction works through the court, but nevertheless, in order to avoid problems, it is better to take care of this in advance.
The materials we need will be acquired step by step in the process of completing our home. First you need to lay the foundation of the house. There are several different types of foundations that we can choose for our tiny home. They resist the effects of decay and water, and they are much easier to install than a concrete foundation. Not only are they light when it comes to workload, but less randomly than your next option.
This type of foundation is common, but for a tiny house design, it can be a bit overwhelming. If we are interested in having a concrete foundation, it is best to mix and pour concrete slabs over a bed of gravel for proper drainage in winter and spring.
The preparation includes the choice of location, planning, procurement of materials. It is also important to determine the type of foundation, the choice of bricks, the method of laying and the roofing material. If you prepare and think everything in advance, then all the work will be easier and faster.
It is important to decide what work you can do on your own, and what should be entrusted to specialists.
If our tiny home is located in a colder climate, adding a frost-protected shallow foundation would be a good idea. Some of us need an elevated foundation because our site receives a lot of rain or is in the flood zone. For others, the raised foundation adds the look we are looking for to our tiny dream home.
The base of the wall wall is similar, but the supports are constant rather than spaced. Do not accept any “shortcuts” when registering our fund. This is one of the most important steps in the construction of our small house. If we cannot lay the foundation correctly, then the frame will be framed, and the cracks in our walls will be a certain potential.
After everything is done, you can begin construction. All work can be divided into the following stages:
- Selection of tools and materials.
- The choice of bricks.
- Planning.
- Foundation pouring works.
- Walling.
- Roofing.
- Finishing work.
So, let's take a look at how to build your own brick house.
After we decide what we want, as our foundation, and it was correctly laid, the next step is to frame. We want to make the skeleton of our house. This step, along with the foundation, is crucial for creating a successful home that is stable and will have a long life. Again, do not make any labels in the frame - this is a vital aspect of the longevity of our home. To get started, we must decide where our main beams and poles will be located, to ensure that its walls can support their own weight when we finish.
Procurement of tools and materials

Building a home is a simple business, but it requires some effort, skills and planning. But, even with all this, it is impossible to imagine a construction site without the necessary tools and materials. Therefore, for such work you will need the following tools:
Brick house design
Lay the rays evenly around the edges of the house, use durable materials and don't be afraid to use metal hangers and ties if the joints seem loose. The same thing applies to the roof, whether we are trying to use a flat or spiky style.
It is best to install rough plumbing, in the event of an accident we do not want it to affect the electrical wiring with the potential for electric shock. Ask any plumber in Los Angeles or another big city and they will tell you the same thing. We must decide where we want our sinks, showers, bathtubs and toilets to be installed.
- building level;
- level;
- construction hammer;
- trowel, trowel;
- bulgarian;
- flashing;
- plumb line;
- building cord;
- shovel;
- concrete mixer.

If we talk about materials, then you need to purchase the following:
- brick;
- cement;
- lime;
- sand;
- plasticizer or liquid soap;
- fittings;
- plywood or boards;
- insulation (slag, mineral wool, polystyrene, expanded clay);
- hydroisol or ruberoid.
All this can be purchased at any hardware store.
Photo of built houses
Think about whether we need a more or less hot water heater, depending on the amount of water we plan to use. It is also time to view the building permit checklist. Often standards are set as to what should be done in a residential building with regard to plumbing.
Then comes the electricity and gas. We must choose whether we want a gas or electric stove to decide whether gas is needed. Now we can choose what type of lighting we want, as well as where we want. Simplified sockets for connecting floor lamps? Remember the places where the sockets are installed, and make sure that they will be enough to meet your needs. Wiring can be placed through tiny holes drilled into wall beams. Make sure they are two feet above the ground in the event of a flood or any other natural disaster around your tiny home.
Which brick to choose

Since in construction stores you can find different types of bricks, you should decide which brick to build the house from. The most popular and leading options are red clay and silicate bricks. When laying, they can be used individually, as well as combined with each other. As experts advise, when laying in the middle, you can add insulation. Since such bricks are quite heavy, the load on the foundation will be appropriate. To reduce it, you can use a brick with cells. This is a lightweight version of ordinary brick, which weighs 20% less than usual.
Where does construction begin?
It is also a great time to consider energy alternatives. Do solar panels sound? If we decide that we do not want to include a roof terrace, solar panels can be a viable and cheap alternative to energy. We have a great article with detailed reviews, so be sure to take a look!
Some counties offer residential homes extra money if they send their extra energy to the nearest power station. However, we can install solar panels outside the network and save all the energy for ourselves. But be careful: if our tiny house is located in an area with lots of trees, the panels may not receive enough sunlight to properly produce the required amount of energy. Make sure that if the solar panels are installed on the roof, a good amount of sunlight is suitable for them.
To make the masonry smooth, beautiful and reliable, do not buy a brick that has already been used. Your material should be whole, of the correct form and without cracks.
After all the necessary tools and materials have been prepared, you can proceed to the next stage - planning.
The second stage is home planning

Once our tiny frame of houses is completed, and plumbing and electricity are finally installed, it's time to build walls and floors. Depending on the type of landscape and climate on which we built the foundation, the choice to be installed first will be up to the builder. As a rule, floors are installed to facilitate movement in the house as new projects appear. Decide if you want wooden floors, bamboo, vinyl, stone, tiles, or any other type of material first.
If we want a carpet, leave this step for a final touch so that it is not dirty when we move on to more dirty projects. Taking the right sizes for the required materials, it is vital that we do not overspend or have to return materials for reimbursement.
As you know, you cannot build something without first planning everything. Therefore, for starters, it is important to determine what the building will be used for. If it will be a small summer house, which you plan to live in during the warm period, then you can build it in half a brick. If the residence is not constant, but at any time of the year, then the walls can be laid in one brick. In this case, the construction will even withstand several floors. Well, when you plan to build a house for permanent residence in it, the wall thickness of such a house is recommended in one and a half bricks.
Apply the same concept to the walls. Make sure the windows and doors are framed correctly and they will be large enough so that we can fit in our furniture and appliances! Remember that internal and external wall materials must be installed properly. Drywall is usually used in conjunction with insulation materials to provide adequate protection against the outside climate. After that, there will be more options related to what we can do with the interiors of our walls.
Finishing - worth it or not?
We can choose bricks, drywall, plaster, gypsum, concrete film, tiles, etc. keep in mind that appliances in kitchens and bathrooms will be installed soon, so the free space around these areas may be ideal for those of us who want to install specialized tiles or other forms of structures in these areas.

If you decide to build a one-story house, then the foundation can be simplified. In this case, the walls of the house will be made of drywall. Under them, strengthening is not required. But when the partitions are built of brick, the foundation will look different. Since the future construction will be made of brick, which has a high density and, accordingly, gives a large load on the foundation, the foundation for your house should be strong enough. The most reliable is the strip foundation, the design of which exactly repeats all the lines of the walls and partitions of the building. Then you need to fill the foundation under each wall and partition. In this case, the entire load from the walls is distributed over the entire area of \u200b\u200bthe soil, in connection with which the stability of the building increases.
It's time to set up the rooms that many people spend most of their time. Here we can finally begin to be creative. As mentioned earlier, make sure that the windows and doors are large enough to carry appliances and materials - otherwise, our ideal fixtures will not fit into our tiny home. When installing counters and sinks, we must pay close attention to where we placed our rough plumbing to make sure that the dimensions correspond to the requirements of the water supply.
It is also time to consider where we want our additional storage for the bathroom, effectively using the space. The same rule applies to the kitchen: set the counters, stove, refrigerator and sink in the correct sizes, which coincide with the rough plumbing and electric. Find out where the storage space will be most useful, and if the island or sideboard fits your perfect design. There are many different types of cabinets to choose from, as well as refrigerators of various sizes and stoves.

In order for your building to be in the correct location, and during the construction process you can avoid unnecessary problems, you need to make markings on the soil that correspond to the plan of your house. Drive the pegs into the ground in the places where the corners of your building will be, as well as in the places where the walls will be erected. It must be a real size. Then take a cord or a thick rope and pull it over all the pegs. Thus, you made a certain landmark that will help you dig a trench for the future foundation. You can check the horizontalness of the tensioned rope with the usual level.
Choose the appliances and countertops that will fit your future decor, and all this will remain within your budget range. It is also important to check the rules that our districts may have in relation to stoves and safety - in some places special materials are required that are installed around our stoves to prevent the spread of fires.
Finally, it's time to install any of the latest additions that we may have in mind for our additional rooms that we have developed. Whether it's a sophisticated sewing room with a built-in sewing machine or a room for playing playing tools, adding specialized details to our tiny home can make a difference if we want to fall in love with our final product.
After all is done, it remains to take the shovels and dig a trench according to your guidelines. To do this, you can ask for the help of your friends, relatives or neighbors, since it will be very difficult to do everything yourself. Moreover, when the house has several floors, the depth of the trench can be up to 2 m.
Foundation formwork

Make sure that the details, such as the lighting in the cabinets, are addressed and install windows that complement the weather - wherever we decide to build our tiny home. Just as designing our tiny home was fun, so do the finishing touches to any home.
Adding these tiles around the stove or mosaic in the bathroom is now ready for completion. Finally, you can install the carpet. Now you can make a complete tiny house, as well as install chandeliers or special lighting. As we see, building our tiny budget house is not so terrifying if we understand the right steps and spend our money accordingly. Many of the tasks described in this manual can be performed by hired specialists at cost, but using our own funds to build a house can be very useful and simpler than we think if we follow simple recommendations.
Based on technology, the foundation needs to be arranged above the ground level by 10-15 cm - this is the minimum indicator. In regions with severe winters, the base can even be 40-50 cm. To accomplish this, you need to install the formwork along the edge of the trench. It can be from plywood or ordinary boards.
In the case when the surface of the site is uneven, you need to find the highest point and build on it.
In order for the foundation to be made in one plane, the formwork must be brought up to the stretched rope in height and made supports. It is important to remember that the higher the formwork is, the more often and closer you need to install supports. If this is not done, the mass of concrete can crush the entire structure, and it will spread or become uneven.
In order for the formwork to hold concrete securely, it must be made strong: without holes, gaps, since concrete can leak through them. Often they use a planed board or plywood for formwork, but you can choose other material at hand.

Before you start pouring the foundation, it is important to make a pillow at the bottom of the trench, pouring fine gravel, stones or sand into it to a depth of not more than 5 cm, after which it must be tamped. If you do not have a vibrating plate or rammer, you can use a homemade device. To do this, take a wooden beam with a section of 150 × 150 mm with a height that is convenient for you and attach handles on the sides. Using brute force, tamp the entire trench. Thanks to such a pillow, the shrinkage of the building will be much less, and the building itself is more stable.
After this, the reinforcing cage is laid along the entire length of the foundation. To assemble it yourself, you will need:
- rebar Ø10–17 mm;
- rebar Ø5–8 mm;
- thin wire for knitting;
- bulgarian;
- nippers;
- pliers.
Calculate how much reinforcement you need, you need in advance. It is important to consider soil data and the number of floors of your future home. We can say for sure that if you build a three-story house on loose soil, then everything will be to the maximum - both the depth of the foundation and the diameter of the reinforcement. To make an accurate calculation, you need a whole topic where all the subtleties and nuances are taken into account, so it is better to use a calculator.

It is important to know that the foundation can be monolithic and prefabricated. A monolithic foundation is made immediately on the spot. To do this, a concrete solution is mixed, which is poured into the prepared trench. The prefabricated foundation consists of ready-made plates that are laid in the ground. For a brick house, a monolithic foundation is much better suited, which is able to withstand huge loads. Even if you build several floors of the house, a basement and a garage, the structure will hold firmly. The only drawback of a monolithic strip foundation is that it is not recommended to use it with soft soil. The best option would be a pile foundation.
So, it is time to fill the foundation of your home. To ensure the strength of the foundation of the house, the filling must be done in horizontal stripes in one go. If you fill it partially or make separate vertical sections, then there is a high probability that these joints can crack. Therefore, everything needs to be done quickly and not without additional help. Ask you to help a friend or relative, as extra hands in this matter are simply necessary.

The first step is to mix the concrete. This is a laborious process, in which you need to make concrete, transport or transfer it to the place where the pouring takes place. To fill the foundation, you need a lot of concrete. If the depth of your trench is more than 60 cm, then after you have poured the first layer of concrete, throw in rubble stones there and continue the process.
After you finish pouring the formwork, you need to compact the concrete, driving the air out of it. For this purpose, a deep vibrator is well suited. But since not everyone can have it, it is possible, using a thick stick, to compact the concrete with up and down movements. After such manipulations, the concrete surface must be leveled with a trowel. Basically, the concrete dries within 5-7 days. But you need to start laying brick only after a month, when the concrete will gain strength and will not be malleable.
Waterproofing works

An important step before laying walls is waterproofing the foundation, thanks to which moisture from it will not penetrate the house or basement, and the brick will not collapse. Thus, you will extend the operational period of foundation of the house and protect yourself from the formation of fungi and dampness.
Such work can be performed after solidification of the foundation. Everything is done quite easily, the main thing is the presence of a waterproofing material (hydroisol or roofing material). It must be laid or glued to the foundation in 2-3 layers. After the construction is completed, all excess pieces that will protrude should be trimmed. The base of the building should be coated with molten bitumen.
Masonry base - mortar

After a month, you can begin work on the construction of a brick box of the building. First you need to make a solution, thanks to which the whole structure will be held securely. The main type of mortar is cement-limestone, limestone or cement. The basis or base for any of them is sieved sand (it is better if it is river). To find out how to make the solution and in what ratio to take the components, just look at the packaging, where everything is indicated. The most common proportions of sand with cement or lime are 3: 1 or 4: 1. In this case, the future masonry will be very durable, and it will not be difficult to do it, since the solution will be inelastic.
To find the best quality ratio of materials in the composition, you need to check them in action, because poor quality cement can be found. You need to make several compositions with different proportions, for example, 3: 1, 4: 1 and 5: 1. The composition does not need much - it will be needed only to make small balls of them. Wait until they all dry, and then hit them with a hammer. Pay attention to the ball that, upon impact, broke, but did not crumble - such a ratio of components as for the manufacture of this ball, and you need to choose.
Erection of brick walls

After the mortar is ready, you can start laying brick. You need to start it with the derivation of the corners. The first bricks need to be laid especially carefully and carefully, since further laying and the general appearance of the future building depend on them.
At first, it may seem that such a job is simple, brick to brick and everything is ready. But it is very difficult for inexperienced masons to make the walls perfectly straight and geometrically correct. To do everything right, you need to try and be patient. Such work is long and tiring, but you will gain practice that will help you further. What do you need to do?
- In the corners you need to put the first bricks. Use a water level to check the horizon and level everything if necessary.
- On the upper edge of the brick you need to pull the twine and fix it perfectly evenly.
- The twine should not bend, interfere with masonry - it should be well stretched, serve as a guide for perfectly even masonry.
- After that, lay the base row of bricks. So that they all fit perfectly, they need to be knocked down with the handle of the trowel, while aligning everything with twine.
- In the case when you make the outer part of the wall with facing bricks, you need to make the alignment. It must be done on a fresh, not frozen solution. Then the surface will be protected from moisture, and the house will look aesthetically pleasing.
- After the first row is ready, the twine needs to be moved in the same way and fixed. Then lay the next row of bricks in the same way, not forgetting the dressing.
- After every third row, you need to use a transverse dressing of the wall.
- Do not forget about the piers. Everything is done in the same way. If you want to make them later, you need to make sure that there is a bundle from the supporting wall from which you can continue laying later. To do this, leave a ladder of bricks in the place where the wall will be built.
- When you reach a certain height, you need to make openings for windows. It is necessary in advance to provide places where there will be openings for doors.
To ensure quality masonry, you need to check the position of each brick.

On this the frame of your future home is ready. It remains only to make the roof. It is difficult to carry out all the work independently. Therefore, ask for the help of professionals who will provide you with a reliable roof over your head.
Now you can be proud of yourself, as you yourself were able to realize the dream of every person. As you can see, building a house on your own is difficult, but possible. Therefore, if you have plans to make a comfortable home for yourself and your family, purchase material and get to work!
Many are now interested in how to build a brick house with their own hands. Brick is one of the most durable materials, so such a house will stand for more than one hundred years. However, it is very expensive, so the construction will require significant costs.
Own brick house has long been considered a symbol of prosperity and respectability. Where to start construction, and how to make it as profitable as possible?
Project preparation and budgeting
Building a brick house can take more than one year, it all depends on the scale of the structure. Work begins with careful planning and a detailed estimate to estimate future costs.
Approximately 20% of the cost of the house falls on the foundation, the price will also depend on the number of floors, the presence of an attic and other design features.
The simplest option is a one-story building, erected according to a standard project. It is necessary to determine in advance the dimensions of the bearing walls and their thickness. For areas with harsh climates, brickwork of 2-2.5 bricks is usually used, this avoids serious heat loss during the cold period.
You should consider the location of rooms, corridors, window and doorways. The project reflects the placement of windows and doors, as well as their area, which allows you to correctly calculate the number of bricks.
It is necessary to determine the type and type of roof and roofing materials, to consider options for insulation and interior decoration.
Advice! It is important to consider unforeseen expenses. Bricks are always purchased a little more than expected, since at least 5% necessarily goes to battle and marriage.
When all the calculations are completed, you can purchase material and proceed directly to the construction. Solving this task alone is very difficult and the work can drag on indefinitely, so it would be wise to calculate options for hiring assistants.
Foundation construction
The foundation is the foundation of the house and the guarantee of its longevity and in no case should you save on it. For: a solid concrete slab will be very expensive, and in this case is not justified.
If the soil contains too much moisture, it is pre-dried and carefully tamped.
According to the plan of the house on the leveled area, the perimeter of the future foundation is marked with pegs and twine. Then a trench is dug under the foundation, the depth of which will depend on the parameters of the soil and the depth of its freezing, as well as on the type and design of the structure.
More accurate data can be found in SNiP 2.02.01-83 “Depth of foundation. A layer of sand or gravel is poured at the bottom. A dense base will help the building to avoid deformation and cracks during shrinkage.
The foundation is reinforced with a metal frame of reinforcement to give it increased strength.
Advice! To achieve maximum strength, it is advisable to fill at a time. For these purposes, it is optimal to order the finished mixture with delivery using an industrial auto-mixer.
If this option is not suitable, then a concrete mixer should be used, and such work should be carried out by several people at once. The top layer of the base is aligned with a trowel. The foundation needs time to dry thoroughly, the full period of concrete setting is about thirty days.
Wall construction
How to build a brick house yourself? Brickwork can be done with your own hands, but if there is an opportunity, it is still better to entrust the work to a professional master. This is a rather complicated matter that requires experience and skills.
Improper masonry can lead to cracks in the walls and collapse of the entire house. However, if you are confident in your abilities, independent work will save a lot of money.
Which brick to choose: silicate or ceramic?
It is important to choose the right brick that is best suited for walling.
There are two options - silicate and ceramic, both have their advantages:
- Silicate brick is the cheapest option in this case, in terms of decorative and other properties, it is not inferior to ceramic;
- Silicate brick can have different colors, which plays an important role in building a house. Double silicate brick M 150 is convenient for the construction of load-bearing walls, its size allows you to save on the purchase of materials. However, it is not waterproof, so it can not be used to build a basement;
- Ceramic building bricks are highly resistant to various destructive influences. He will not be afraid of either humidity or low temperatures, this is a very durable material, although in comparison with silicate brick it has a large thermal conductivity.
It is better to consider all options in advance and choose the best material for the price and quality. Before starting masonry, a layer of roofing material for waterproofing is laid on the foundation. A control cord is pulled from corner to corner, helping to see a straight line for the proper laying of rows of bricks.
Solution preparation
Sand before work is sifted through a construction sieve so that there are no pebbles, twigs and other construction debris left in it.
Advice! It is important that the amount of the prepared solution can be used 1 time, otherwise it will harden and will be unsuitable for further work.
The components of the mortar in the right proportions are laid in a concrete mixer and mixed until ready, then the solution is poured into a tub and you can proceed directly to the brickwork.
Masonry walls
Masonry starts from the corners, where several bricks are laid out at once. Then, a solution is laid out on an even layer up to 8 mm thick, and bricks are laid on it.
The first row should be a reference according to the scheme, since the entire subsequent wall will depend on it. The lower rows - the basement of the building - should be laid out only of ceramic bricks.
Brick laying instruction - basic rules:
- Before work, if the brick is very dry, then it is immersed in water for several minutes. Ceramics have the ability to absorb moisture, and if this is not done, it will draw it out of solution, reducing its strength;
- Masonry is carried out with strict observance of the dressing: this is the name of the basic principle according to which each subsequent brick should be laid in two in the previous row. Such a scheme provides the strength of the joints and prevents the appearance of cracks;
- With each new row, the corners rise up, they must constantly exceed the main masonry by 4-5 rows. They are constantly checked with plumb bob. The horizontalness of the rows is determined using the construction level, it is important to ensure that the solution layer is uniform throughout the row;
- The walls between them must be strictly perpendicular, a building square is used for verification. It is necessary to constantly monitor the correctness of all measurements and monitor the quality of work.
Masonry is a rather painstaking work requiring responsibility and patience. The photo shows how the correct masonry looks.
- Before installing floor slabs in a two-story house, a bonded row of masonry must be made;
- Strengthening of the strength is facilitated by reinforcing masonry with special nets every few rows. At work, the building brick should be only intact, without chips and cracks.
The video in this article will show the main stages of building brick walls:
Roofing in a brick house
As a rule, pitched roofs are used for low-rise houses, since snow does not accumulate on them in winter, and they last longer. After the walls are completely finished, you can lay the attic floor and go to the arrangement of the roof.
Its frame consists of Mauerlat and rafters.
Mauerlat is a support for rafters, a thick beam is usually used, and it is better to lay it around the entire perimeter of the building. Rafters are powerful bars that will further support the roof.
For fixing roofing materials, a wooden crate is used, the step of which will depend on the chosen coating. If a soft roof is used, then a continuous flooring made of plywood or OSB boards is used as a lathing.
The roof in a brick house requires additional insulation. First, a vapor barrier layer is located under it, insulation material is laid on it (most often, mineral wool), a layer of waterproofing is placed on top so that condensate does not accumulate in the attic.
A multi-layer “roofing cake” will allow the building not to lose heat, while in the attic it is necessary to provide adequate ventilation.
Arrangement of insulated floors in a brick house
The floors in a brick house are often made of wood, as they are easiest to insulate. In this case, wooden logs are installed, between which insulation layers are laid.
Subfloor boards are laid on top, on which you can lay any finishing coating. A laminate, linoleum, parquet can act as such a coating, but in any case, the floor will not be cold to the touch.
If desired, in a country house you can equip a system of underfloor heating. This is additional heating and protection against colds in the cold.
Electric underfloor heating involves laying heating elements under the floor. It is comfortable, convenient and safe, especially since the temperature can be adjusted.
At the end of construction work, you can proceed to the rough and fine finish. There can be many options, and the choice will depend only on the capabilities and desires of the owner.
Exterior home decoration can also have various options. A brick looks good on its own, but some people prefer to plaster it or to clad a house.
Conclusion
Knowing how to build a brick house, you can create your own family estate, since such a building will serve not only you, but also your great-grandchildren. Brick is quite durable material and is not afraid of time, steadily withstanding any test. The house will be durable, comfortable and warm, in addition, it can be made beautiful and stylish.


